28 Oktober 2013

Making-Of-Monday #6

Making-of-Monday #6


Its monday again and I want to show you my latest making-of.
I really love mermaids and I bought two cute mermaids from Playmobil the other day. I made a scrapbook layout about them and used some stamps and fun paper and embellishments from different scrapbook kits by Studio Calico.


I stamped some waves with a stamp by Studio Calico in two different kinds of blue.


After that I put on some silver glittertape by American Crafts.


I adhered some paperstrips in yellow and some washitape to the page.


More paperstrips!


Mr Hueys is my best friend when it comes to adding some inkspatters


After that I added a big paperstrip in red and some cute stickers by Simple Stories in blue.


The photo shows the two mermaids! I adhered some fun photo overlays too!


I added a fun title. Love long titles, you can use a lot of alphastickers that way.


I embellished the page with brads (yeah, love brads!) and enameldots in different matching colours.


Have a fun and scrappy monday! 

20 Oktober 2013

Roller Stamps & Twine -Scrapbook Layout With Double Scoop

Roller Stamps & Twine -Scrapbook Layout With Double Scoop

Sometimes I take instagrams of my scrapbooking stash! Love that. On the first photo you can see me beloved giant roller stamp by Pebbles between the other smaller ones in the white basket. The second photo shows a jar filled with bakers twine in lots of different colours. Bakers twine is such a versatile embellishment and I use it often on scrapbook layouts or cards! Love my stamps and the twine. 


I used the Double Scoop kits by Studio Calico for this page. Love the bright and yellow background. For the journaling I used a 3x4 card from the PL kit! These cards are just perfect for journaling.


The title is a mixture of 3 different sorts of alphastickers. I used the ones that came with the kit, the ampersand is by Pebbles and the pink ones are from Sn@p! Studio by Simple Stories.


18 Oktober 2013

Prinsengracht - Scrapbook Layout With 3 Photos

Prinsengracht - Scrapbook Layout With 3 Photos 

Hei and welcome back to my blog! Who doesn`t love all the canals in Amsterdam? My husband and I walked down the long Prinsengracht and I took a lot of pictures of the the most beautiful canals in Amsterdam. The people who live there have really a stunning view, but the houses are expensive though! I love these old buildings and I really wished I could live there. Maybe one day we will end in Amsterdam? Who knows what the future will bring?


I made this scrapbook layout with the new Antiquary Scrapbook Kit and Amsterdam Add On by Studio Calico and I used 3 photos. But I took way more photos of our walk. So I will make more pages with the kit and add on.


I love the mix of all sorts of embellishments. The wooden hearts, the washitape and the die cut shapes are just perfect for this page!


17 Oktober 2013

Be Happy & Enjoy Amsterdam - Scrapbook Layout With Bright Colours

Be Happy & Enjoy Amsterdam - Scrapbook Layout With Bright Colours


Amsterdam is my favourite city in the Netherlands. Love being there, walking around and taking some really cool pictures. This page works as an introduction page to my scrapbook layouts about our 2 trips to Amsterdam this summer. Old buildings, like this church and bicycles are just typical for the city. So I took these two photos and combined them on this scrapbook layout. I made this page after a layout by Shimelle. Love all the bright and happy colours.


More orange photo projects can be seen at Luzia Pimpinella! Have fun!

15 Oktober 2013

All Hallow`s Eve - Scrapbook Layout With Overlays and Glitter Thickers

All Hallow`s Eve - Scrapbook Layout With Overlays and Glitter Thickers


Its tuesday and yesterday I wanted to show you a new "making-of", but unfortunately I have to take some new photos of the finished project, so I will show that special project next monday! Meanwhile I want to show you this really cool spooky scrapbook layout.
I lifted a page by Jill Sprott. I love here style very much and I wanted to try this cool grid design. She did not use any Halloween styled paper and embellishments, but I love Halloween collections and "Thirty One" by Pebbles has such great colours, patterns and embellishments, that I had to use lots of it on this scrapbook page! I used the funky photo overlays too.


The photos were taken at our Halloween party last year! In 2 weeks we will have the next Halloween party and the boys are really looking forward to it! What will you do at Halloween?


13 Oktober 2013

Store Skillingen - Scrapbook Layout With Frame Hang Tags

Store Skillingen - Scrapbook Layout With Frame Hang Tags

I totally forgot to show you my other scrapbook layout with the wonderful late summer collection "Front Porch" by Pebbles! The other day we went to this amazing see in the middle of nowhere, ok, its actually nearby...we really live in such a beautiful country! We love hiking at the weekends and we had a rest at this sea. Its fall now and the leaves turn red, orange and even yellow. Love this season so much!


I used 2 of the frame hang tags that comes with the collection. I love such great and versatile embellishments.


I punched out some traingles with my new triangle punch! Love that kind of tool!


Hope you all have nice and sunny weather! We have the most beautiful fall here in Norway. Last year we had snow at this time. Tomorrow I will show you a new "Making-Of". So stay tuned!

11 Oktober 2013

Step-By-Step Tutorial Milk Carton Box

Step-By-Step Tutorial Milk Carton Box

Hei and welcome to my blog! Today I want to show you how you can make a small milk carton box without using a fancy and expensive die or Silhouette die cutting machine! You need a 12x12 sized cardstock or patterned paper for this.

Step #1
Cut a 10,5 inch x 7 inch sized piece of paper out of patterned paper or cardstock.

Step #2
Turn the paper horizontal and score at 2,5 inch, 5 inch, 7,5 inch and 10 inch.


Step #3
Turn the paper vertical and score at 1 inch, 3 inch and 5,5 inch.


Step #4
Turn the paper horizontal and score at 1,25 inch and 6,25 inch to the upper scored line.


Step #5
Score diagonal lines where indicated.


Step #6
Cut out the retangle at the bottom right side as seen in the photo. 
Cut along the 3 bottom vertical lines.


Step #7
Fold along all scored lines, carefully fold along the diagonal lines - the fold will be natural. 
Glue tab inside. Use strong adhesive.


Step #8
Put the box together.

Step #9
Secure top with a binder clip or punch a hole and tie with a ribbon.


Step #10
Embellish the milk carton box!


08 Oktober 2013

You Are Simply Wonderful - Scrapbook Layout With Small Photos

You Are Simply Wonderful - Scrapbook Layout With Small Photos

I just love pages about my two boys! I took this photo with my Nikon and its just perfect! My boys always have a lot of fun together! 


I printed out the photo 3 times and framed them with these cute frame hang tags from the collection "Front Porch" by Pebbles. These frames are just perfect for small photos!


Aren`t these clothes pins just adorable? I love such cute and versatile embellishments.


I punched out a lot of different sized circles and embellished the page with banners, cute birdies and books. Tomorrow I will show you another scrapbook layout with the "Front Porch" collection by Pebbles! So stay tuned!

Supplies:
Value Pack Baker`s Twine 12 Bright Colors

05 Oktober 2013

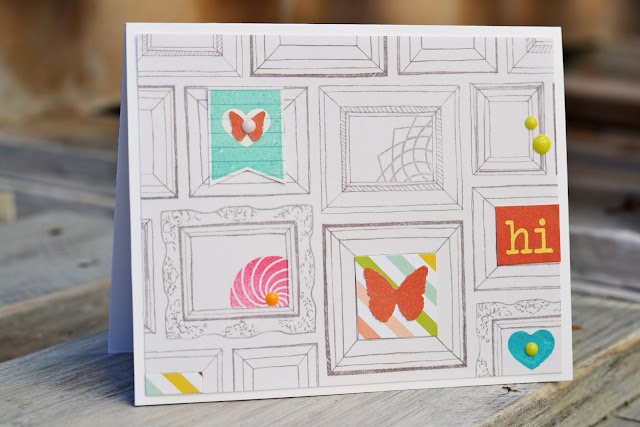
Cards On Saturday #8 - World Card Making Day

Cards On Saturday #8 - World Card Making Day


Hei and welcome to my blog! Today is World Card Making Day and I want to show you my latest cards. All cards are lifted and I got all the inspiration from cards by the fabulous Studio Calico Creative Team! I lifted cards and ideas from Danielle Flanders, Gayatri Murali, Lisa Spangler and Maile Belles! Thank your ladies!